Blind Line & College Ave
Orangeville, Ontario

Open LG's hidden service menu with a DIY IR transmitter and unlock features normally reserved for higher-end models.

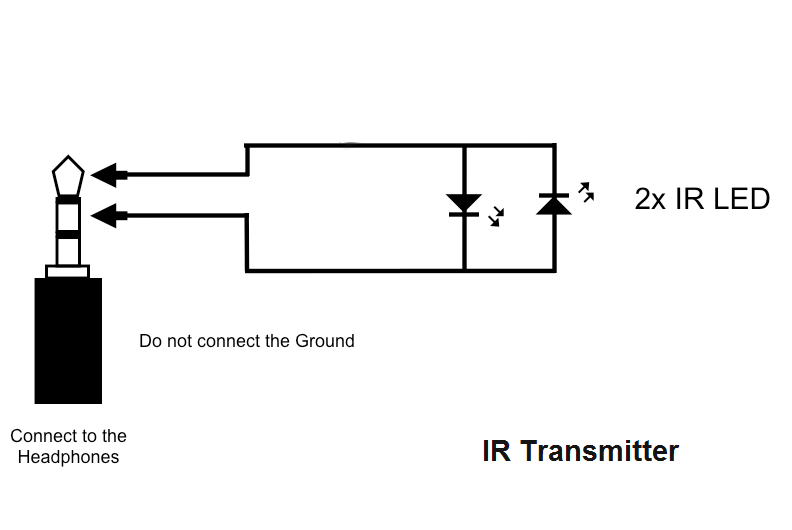
Access the hidden LG service menu and enable features that are normally only available on higher-end models. This works by sending service codes to the TV with a simple improvised IR transmitter — you play a special audio file through an IR LED wired to a headphone jack.
Use caution when changing settings — the wrong change can make your TV unusable. Only enable features you've seen others confirm for your specific model number, and power-cycle the TV after changing each option to avoid corrupting the firmware.
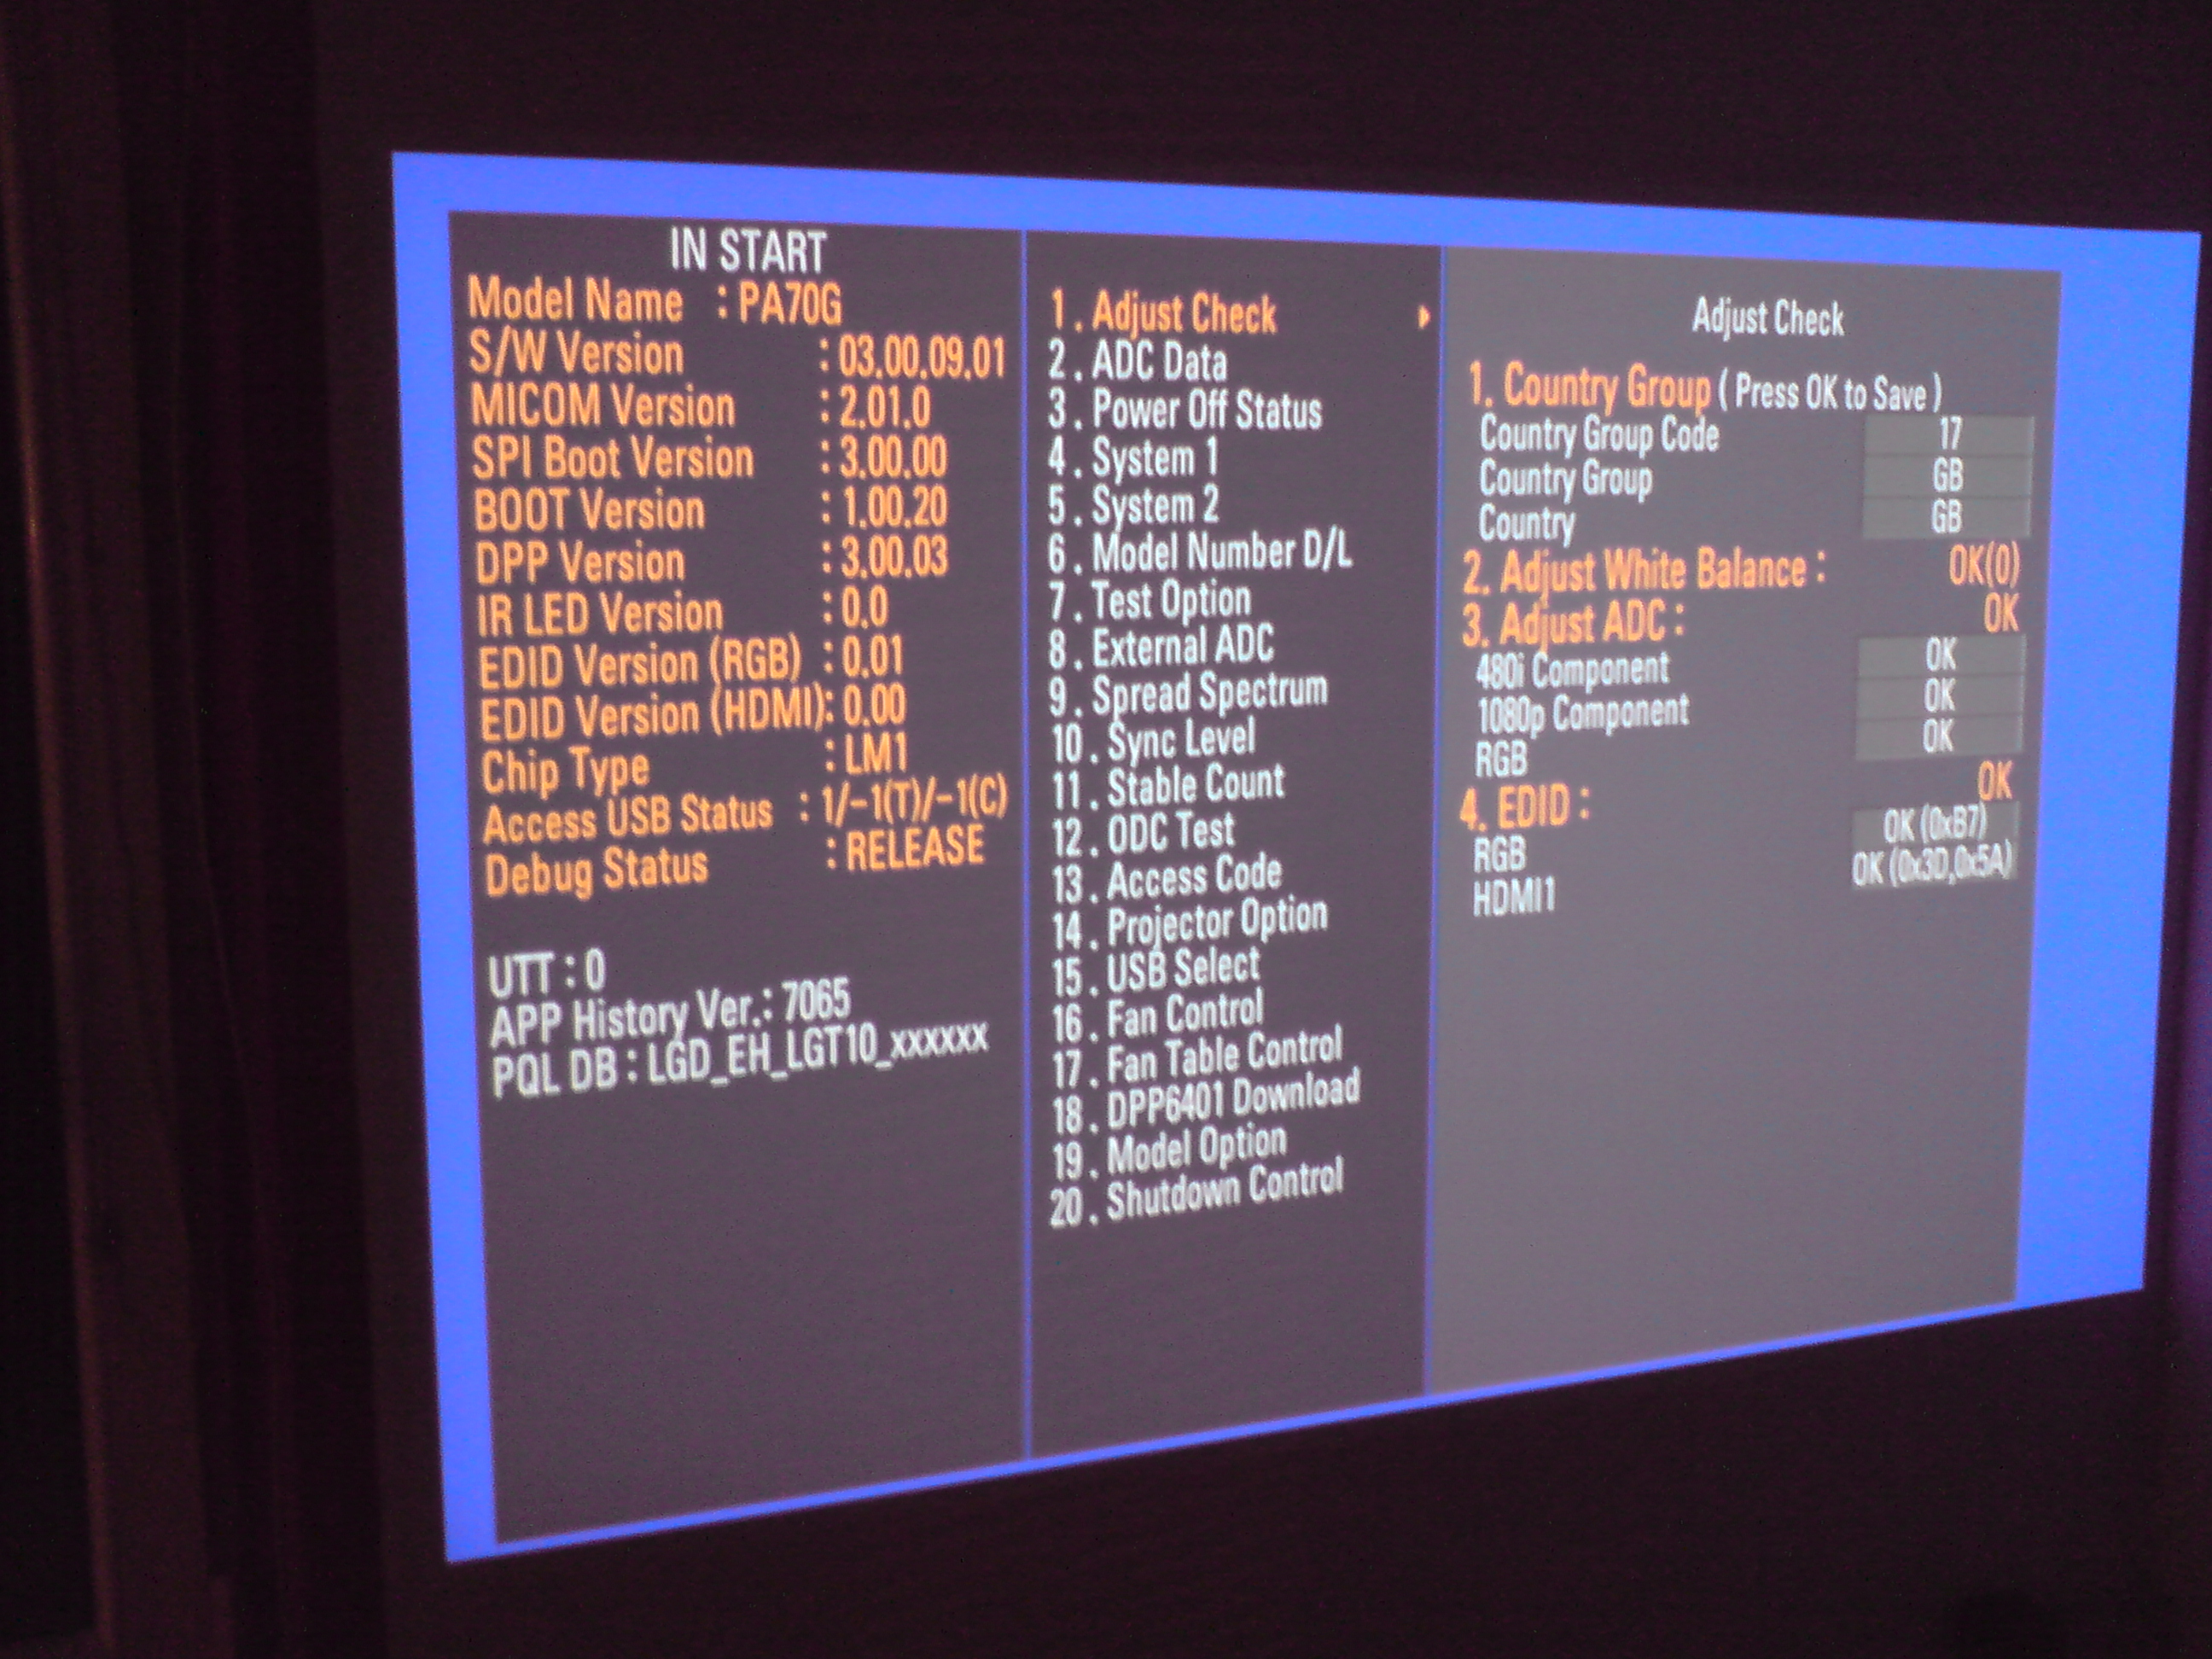
0000 or 0413) — you must use the original remote to input the code.EZ_ADJUST — simplified In-Start menu.
IN_START — advanced settings menu.
POWER_ONLY — the screen goes to a white screen saver. To exit, press "Back", change input, and power off/on.
LEX8, LZ9800, LZ970, LZ9700, LZ9600, LW9600, LW950,
LW9500, LW770, LW7700, LW7500, LW650, LW6500, LW570,
LW5700, LW5600, LW550, LW5500, LV570, LV5700, LV550W,
LV550T, LV5500, LV5400, LV375, LV373S, LV372S, LV3700, LK550,
LK530, PZ950, PZ570, PZ750, PZ550, PZ540, 32LV3730,
and most models produced in 2011I have a 47LW5700 and added features available on the LW5600 model:
Steps I used in EZ_ADJUST:
Tool Option1 --> Set Tool = LW56           (changes the TV to a LW5600)
Tool Option2 --> Set LocalDim Menu = 1     (turns on the menu item)
Tool Option4 --> Set local dimming = 1     (turns on local dimming)
Tool Option3 --> Set THX = 1               (enables THX video/audio options)
Tool Option3 --> Set ISF = 1               (enables ISF video options)
Tool Option3 --> Set DVR Ready = 1         (enables the DVR feature)
Tool Option5 --> Set Channel Browser = 1   (enables channel thumbnails)
Select AC3 EDID D/L --> Press Start (enables 5.1 AC3 output via optical)The following is a large collection of community notes compiled from a long forum thread — kept here as an unformatted reference for advanced tweaking.
EZmenu note: to accomplish this on my TV I used my Brighthouse remote and used the info from the Radio Shack remote — just changed 9-9-4 to 0056 to match my remote per their instructions.
Don't brick your TV — be conservative and don't change anything you don't fully understand.
What is this Secret Hidden Menu (EZMenu)? In a nutshell, there's a hidden menu that lets the LG factory turn features on and off using a 1 or 0 value. Quite a few LG TVs can perform some higher-end model functions because the architecture is almost identical. There is risk — but it's like overclocking a PC: only turn on features you've seen others discussing for your particular model number and you'll be fine.
All LG service techs have a specialized remote to access this menu. You can buy one, or use a cheap universal/Harmony remote configured with the "Poor Man's Service Remote" procedure (search openlgtv.org.ru wiki: "Access hidden service menus / modes").
Example — turning a 47LW5700 into a 47LW5600 (local dimming): Password = 0413 or 0000 (use the original remote to navigate and enter values).
After any change, exit the menu, wait 10 seconds, power off the TV, wait 20 seconds, then power back on.
Other cool tweaks:
Word to the wise: do NOT select THX Media Director on any LCD TV — it can destabilize the TV; it's meant for plasma (PDP).
3D starting-point picture settings: Picture mode Standard, Backlight 80, Contrast 100, Brightness 50, Sharpness 50, Color 55, Tint 0, Color Temp 0, Dynamic Contrast Medium, Dynamic Color High, Clear White Off, Skin Color 0, Noise Reduction Low, Super Resolution On, MPEG NR Low, Gamma Medium, Black Level Low, Eye Care Off, Real Cinema On, Color Gamut Wide, TruMotion Off, LED Local Dimming Medium, Energy Saving Off. Backlight is the key for day/night: Night ≈ 28, Day ≈ 80–90.
2D expert settings: Energy Saving Off, Picture Mode Expert1, Backlight 28, Contrast 89, Brightness 52, H/V Sharpness 50, Color 50, Tint 0. Expert control: Dynamic Contrast Off, Noise Reduction Off, MPEG NR Off, Super Resolution Off, Black Level Low, Real Cinema On, Color Gamut BT709, Edge Enhancer Off, Color Temp Warm, Gamma 2.2. 2-point white balance: Contrast R -6 G 0 B -34, Brightness R 2 G 0 B 1. 10-point at 20/30/90/100 IRE and CMS values are listed in the original thread.
Sound / AC3: LG doesn't pay DTS licensing, so DTS is blocked — but AC3 / Dolby Digital can be passed through. In the EZ Adjust menu, scroll to "AC3 EDID D/L" and press select, then Start — it sequentially enables AC3 on each input. When it says "OK", exit, wait 10s, power off, wait 20s, power on. If you get lip-sync issues over optical, try the audio-sync option, or the "erase to NG then re-write with all cables unplugged" fix from the thread.
Roll back firmware (standard remote): Home → Setup → highlight the Option menu (toolkit icon) → press 9 six times. It automatically rolls back and reboots.
DVR: This TV has built-in DVR functionality — you just supply an external USB drive. Option 3 → DVR Ready = 1 enables Time Machine. Plug the drive into USB port 1, decline the "use it" prompt, go to the home screen, open the Time Machine app, and initialize/format the drive. HDMI sources may prohibit recording; the DVR feature is officially enabled only for certain country codes (FI, SV, N, DK, ES, RU, UA, KZ, LT, EE, LV, CZ) — changing the country/group to bypass the HDMI restriction can brick the TV.
General: Real Cinema is not available for progressive-scan content.
Project files (service menu audio files): LG-Service_Menu.rar (MediaFire)
Share USB-only printers and devices over Wi-Fi/LAN using a Raspberry Pi and the VirtualHere USB server.
Reuse the Xfinity/Comcast Sercomm iCamera2 as a standalone IP camera — power, setup, configuration and troubleshooting.
Give the HP TouchPad a second life: replace webOS with Android (CyanogenMod) using TP Toolbox, step by step.
Fix slow or dropping cable internet by checking your modem's signal levels — what the numbers should be and how splitters affect them.

Sign up and get notification about new services, promotions and sales.
