Blind Line & College Ave
Orangeville, Ontario

Reuse the Xfinity/Comcast Sercomm iCamera2 as a standalone IP camera — power, setup, configuration and troubleshooting.
How to Use a Sercomm iCamera2 as an IP Camera
This guide helps you reuse a Sercomm iCamera2 (the Xfinity/Comcast home-security camera) when you've lost the original power cable or want to run it wired. You'll learn how to connect and set it up, configure it as a standalone IP camera, and troubleshoot common issues.
To connect the iCamera2 you'll need to DIY or buy an adapter that supplies the camera with both data and 12V power. Plug one end of the custom Ethernet cable into the iCamera2 and the other end into your router.
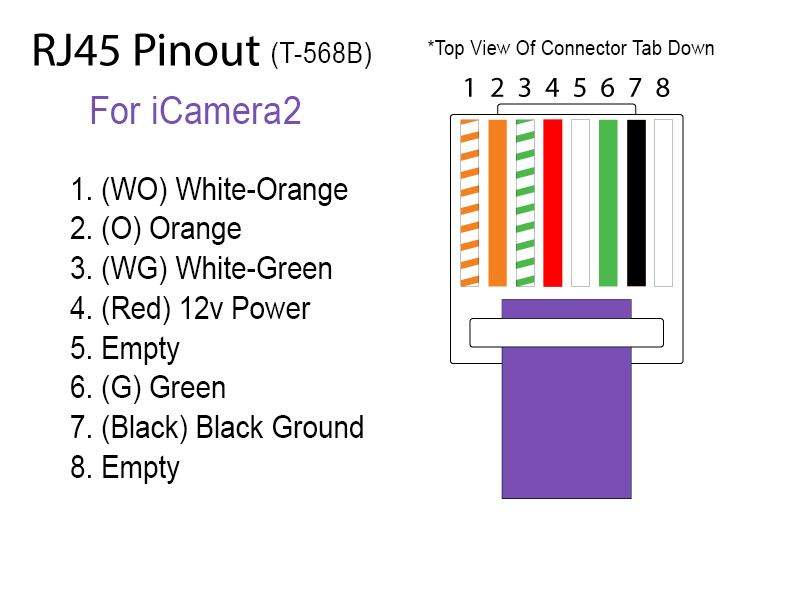
This camera does not use standard PoE — it needs 12V 1A supplied through the connector. Follow the pinout below exactly, or you can damage the camera.
The Ethernet connector requires both Ethernet data and 12V 1A power to run wired. A wired connection is needed for the initial configuration; after that you may use Wi-Fi, but you still have to provide 12V through the connector.
The pinout from left to right, with the cable inserting from the bottom (tab down):
| Pin | Short | Wire / Function |
|---|---|---|
| 1 | WO | White-Orange |
| 2 | OR | Orange |
| 3 | WG | White-Green |
| 4 | 12V | 12V Red Power |
| 5 | — | Empty |
| 6 | G | Green |
| 7 | GND | Black Ground |
| 8 | — | Empty |
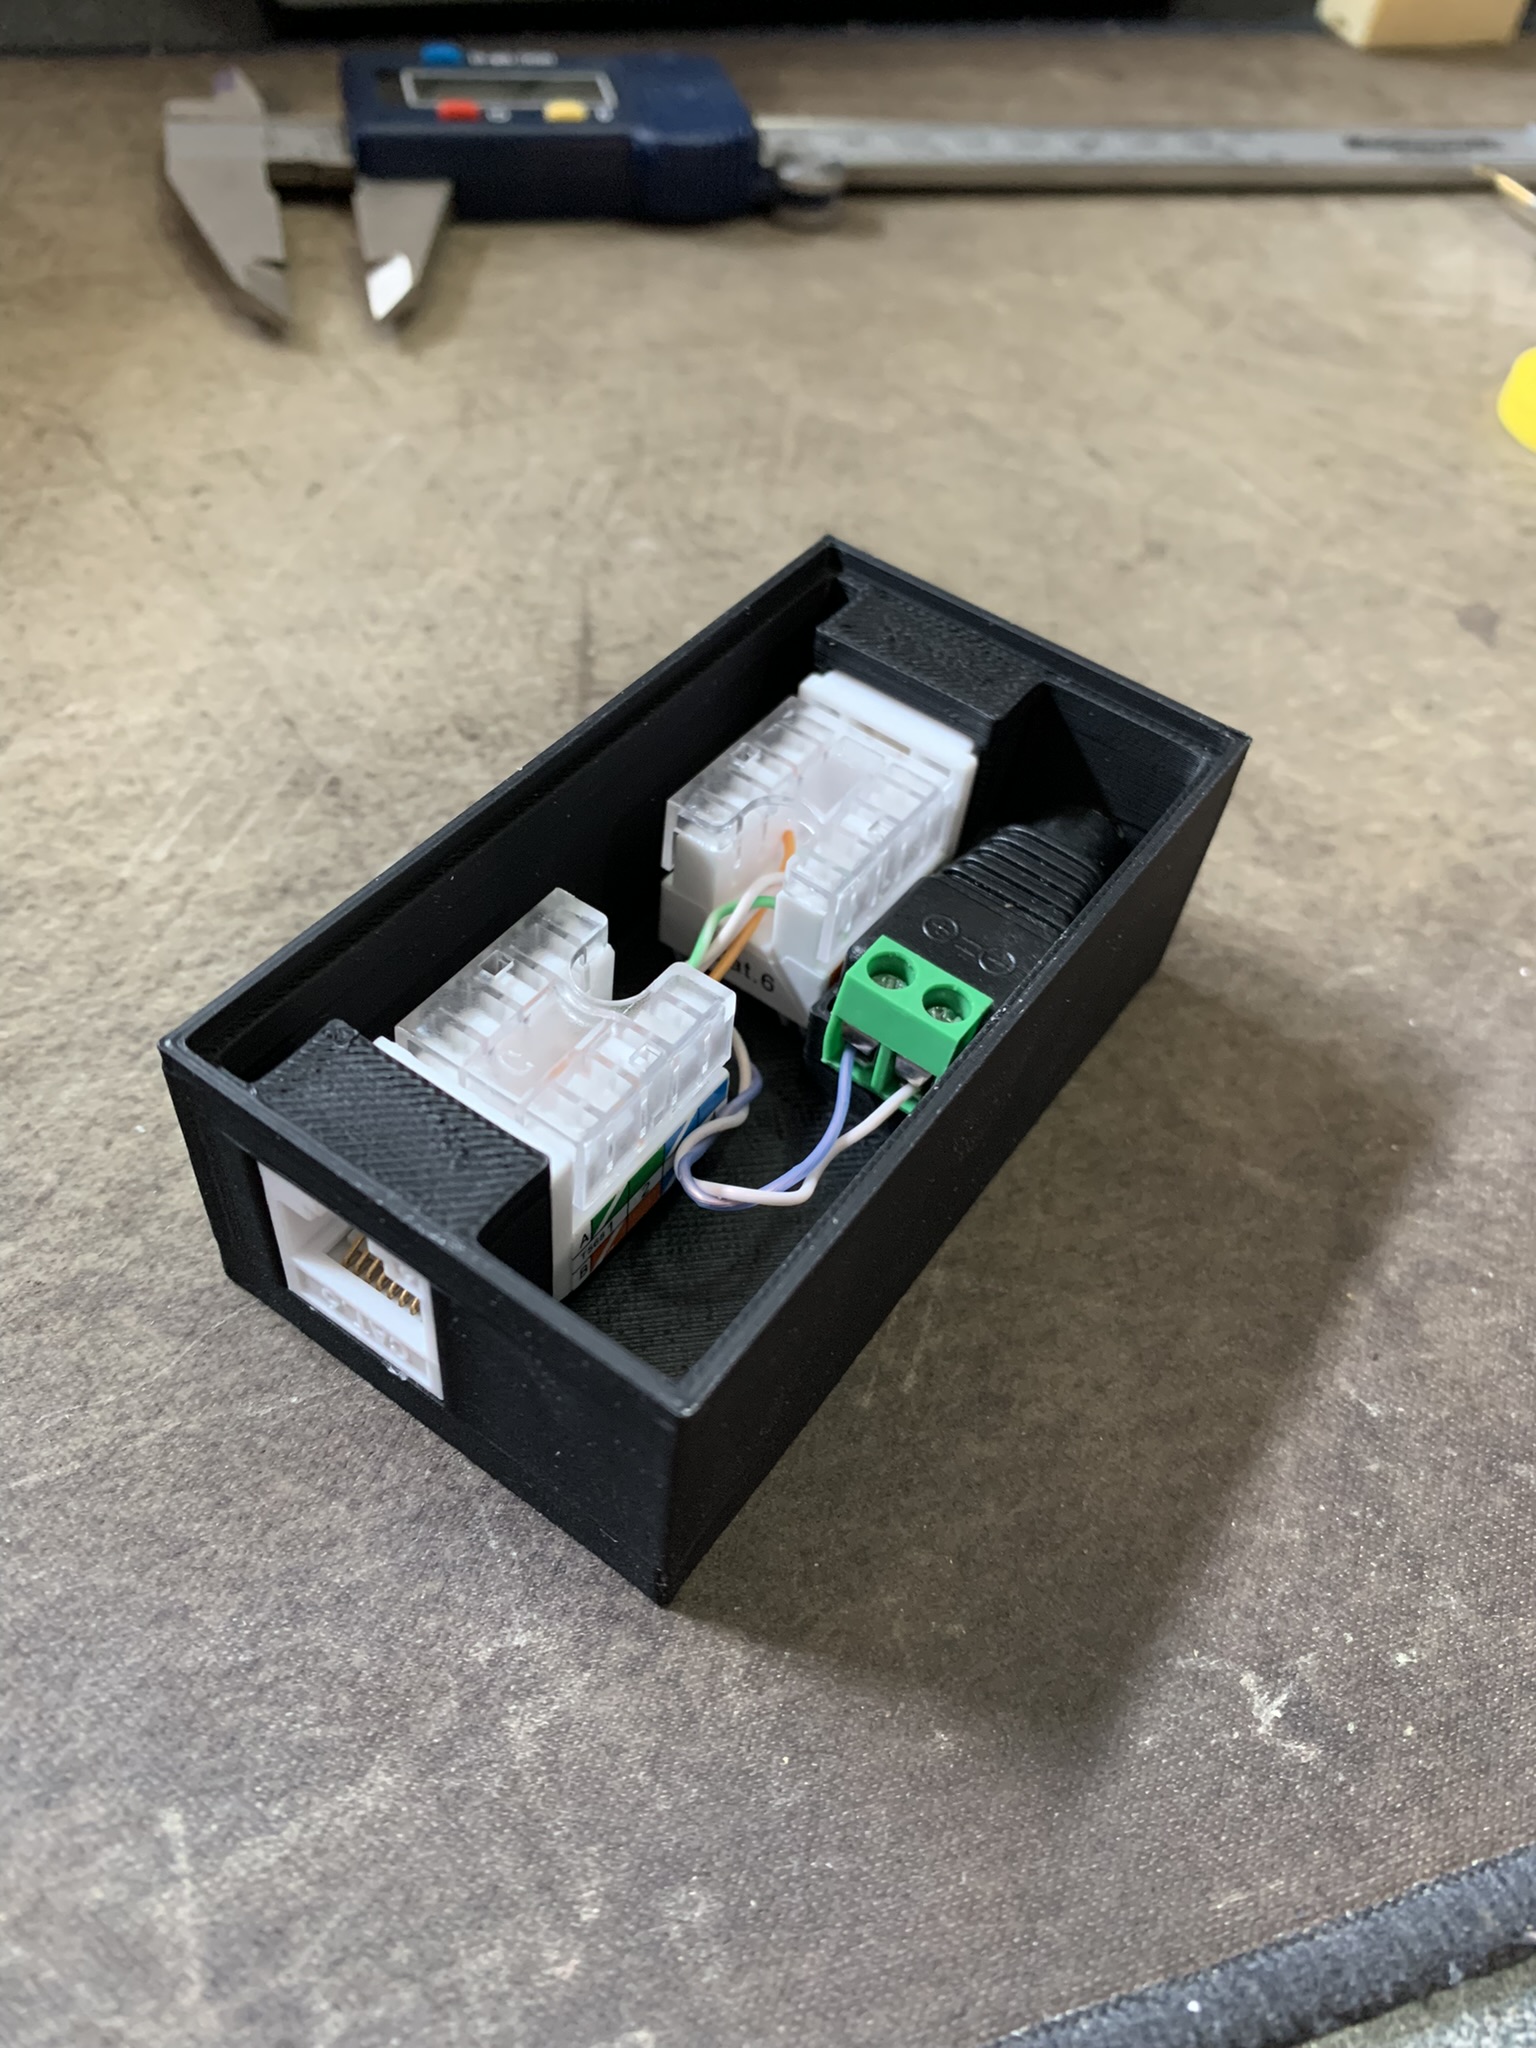
Here's a 3D-printable enclosure to make a nice-looking keystone PoE box: Keystone 12V Case (Printables)
Amazon affiliate links: Keystone Jacks · 12V DC Jack
First, reset the camera to its defaults:
Next, access the web interface. Open a browser and type in the camera's IP address. If you don't know it, use an IP scanner like Advanced IP Scanner.
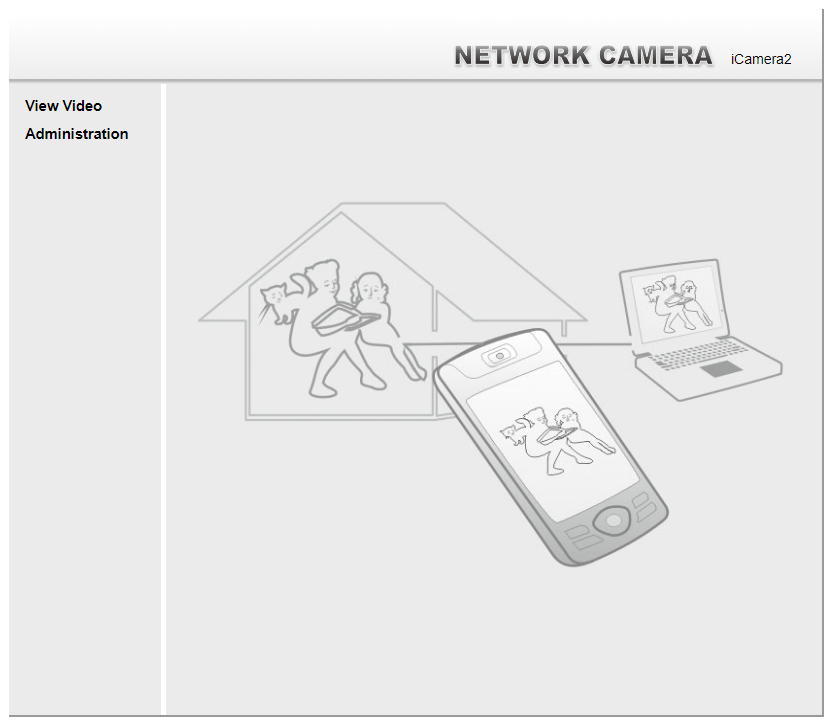
Click Administration. The default username is administrator with no password. You'll then be able to create a new admin user with a strong password.
Log in quickly and change the admin username and password, or ensure the camera can't reach the Internet yet. Some cameras "phone home" and reconfigure themselves with the vendor's username & password.
Some cameras don't show the web interface by default and may show a 404 error page. This command activates the administration menu:
http://administrator@CAMERA-IP-ADDRESS/adm/enable_ui.cgiYou should see a page that simply says "Response OK". Now try to access the web interface again.
Thanks: edent/Sercomm-API
Once you're in the web interface, you can configure the iCamera2 to work as a standalone IP camera. This may involve changing settings such as the camera's IP address and port number.
Finally, test the camera to make sure it's working correctly. You can do this by accessing the camera's feed from another device on your network.
{
    "name": "<Camera Location Name>",
    "manufacturer": "Sercomm",
    "model": "iCamera2",
    "serialNumber": "<Camera Serial Here>",
    "videoConfig": {
        "source": "-i rtsp://administrator@<Camera IP>:554/img/media.sav",
        "stillImageSource": "http://administrator@<Camera IP>:554/img/snapshot.cgi",
        "audio": true
    }
}
Wired or Wi-Fi connectivity is supported. You can configure Wi-Fi from the browser UI or with a URL:
Set SSID:          http://CAMERA-IP-ADDRESS/adm/get_group.cgi?group=WIRELESS&wlan_essid=YOUR_WIFINAME
Set WLAN Password: http://CAMERA-IP-ADDRESS/adm/get_group.cgi?group=WIRELESS&wpa_ascii=YOUR_WIFIPASS
Thanks: homebridge-camera-ffmpeg (Sercomm iCamera2 config)
Hold the reset button while applying power to the camera. This puts it into recovery mode (the power LED flashes rapidly) and it assumes the IP address 192.168.0.99. Visit 192.168.0.99 to find the firmware update page, from which you can upload new firmware.
Once done, let the camera power on normally, then press and hold the reset button for 30 seconds to reset it into setup mode. After this, you should be able to access the camera using its DHCP IP address.
iCamera1000 firmware files:
http://edge.xfinity-home.top.comcast.net/firmware/DYW9HZ-105-1002R08.bin
http://edge.xfinity-home.top.comcast.net/firmware/DYW9HZ-308-1002R17.bin
http://edge.xfinity-home.top.comcast.net/firmware/DYW9HZ-308-1002R19.bin
http://edge.xfinity-home.top.comcast.net/firmware/DYW9HZ-308-1002R22.bin
iCamera2 firmware files:
http://edge.xfinity-home.top.comcast.net/firmware/DAXNHZ-104-300114.bin
http://edge.xfinity-home.top.comcast.net/firmware/DAXNHZ-105-300124.bin
http://edge.xfinity-home.top.comcast.net/firmware/DAXNHZ-105-300126.bin
http://edge.xfinity-home.top.comcast.net/firmware/DAXNHZ-106-300128.bin
http://edge.xfinity-home.top.comcast.net/firmware/DAXNHZ-106-300129.bin
http://edge.xfinity-home.top.comcast.net/firmware/DAXNHZ-108-300132.bin
http://edge.xfinity-home.top.comcast.net/firmware/DAXNHZ-110-300229.bin
http://edge.xfinity-home.top.comcast.net/firmware/DAXNHZ-110-300230.bin
http://edge.xfinity-home.top.comcast.net/firmware/DAXNHZ-111-300235.bin
http://edge.xfinity-home.top.comcast.net/firmware/DAXNHZ-111-300238.bin
http://edge.xfinity-home.top.comcast.net/firmware/DAXNHZ-111-300239.bin
Thanks: itbyfire.blogspot.com
iCamera2 Manual: FCC ID user manual
Adding to Homebridge: homebridge-camera-ffmpeg config
Camera API details: edent/Sercomm-API
That's it — you've successfully set up your iCamera2 as a standalone IP camera.
Share USB-only printers and devices over Wi-Fi/LAN using a Raspberry Pi and the VirtualHere USB server.
Give the HP TouchPad a second life: replace webOS with Android (CyanogenMod) using TP Toolbox, step by step.
Open LG's hidden service menu with a DIY IR transmitter and unlock features normally reserved for higher-end models.
Fix slow or dropping cable internet by checking your modem's signal levels — what the numbers should be and how splitters affect them.

Sign up and get notification about new services, promotions and sales.
