Blind Line & College Ave
Orangeville, Ontario

MEC-1663 JTAG pinout and RT809H method to remove the BIOS password on a Lenovo T14s (same approach as T490s / X390).
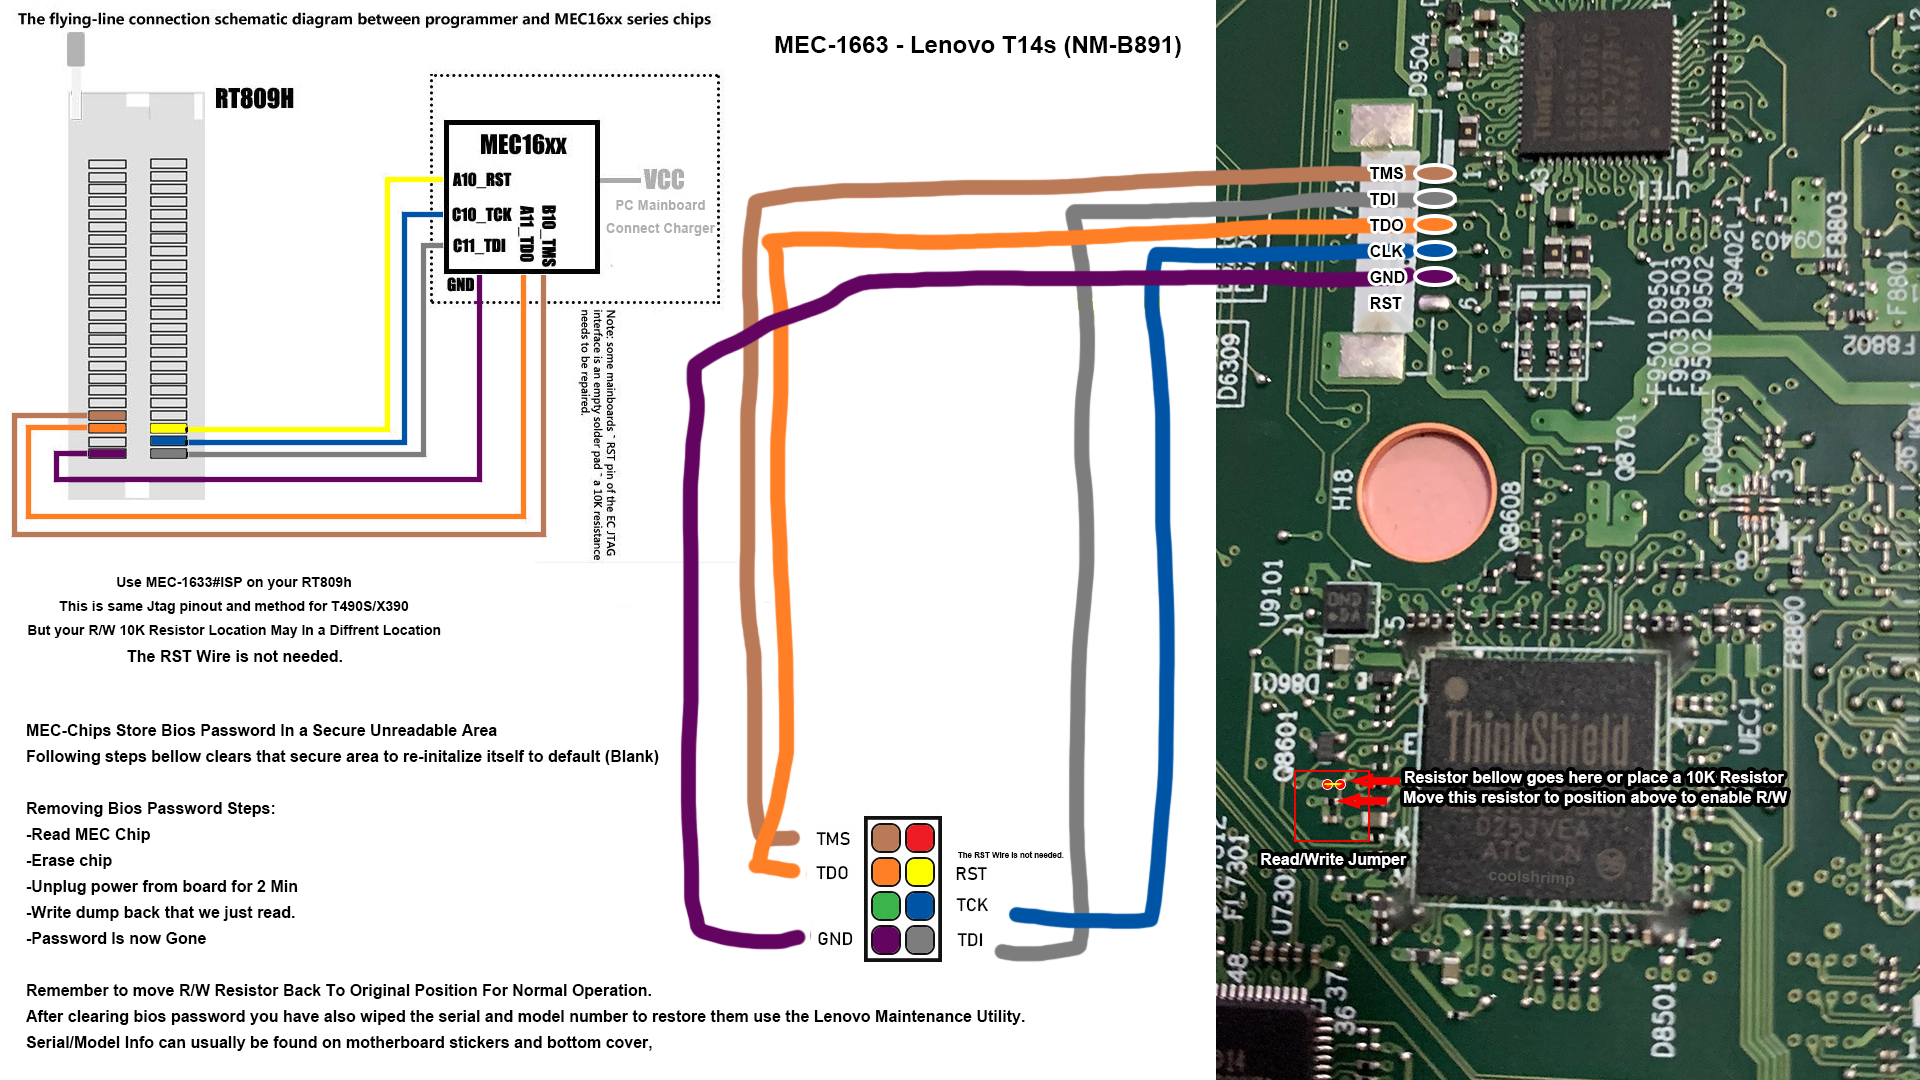
Everything you need to remove the BIOS password from a Lenovo T14s (or any board with an MEC chip) and write the config data back afterwards.
RT809h programmer. Use the MEC-1633#ISP profile on your RT809h. This is the same JTAG pinout and method as the T490s / X390 (but the R/W 10K resistor may be in a different location on those boards).
MEC chips store the BIOS password in a secure, un-editable area. The steps below clear that area so it re-initializes itself to default (blank).
Remember to move the R/W 10K resistor back to its original position for normal operation. Clearing the password also wipes the serial and model number — restore them with the ThinkPad Config utility below before returning the machine to service.
After clearing the BIOS password you've also wiped the serial and model number. Restore them with the ThinkPad Config Information Update Utility v1.11 (attached below). Serial/model info can usually be found on the motherboard stickers and the bottom cover.
usbfmtpw.exe — this formats your USB and copies the files over. (Check the files copied after formatting; if not, manually copy them to the root of the USB.)C0 then Enter.1S, so 1STTTTMMMMCCSSSSSSS.Product ID: TTTT-MMMMCC
Serial#: SS-SSSSS
TTTT = Machine Type
MMMM = Model Type
CC = Country Code
SSSSSSS = Serial NumberTrack down what's slowing your PC — Task Manager, startup programs, disk health, malware checks and more, step by step.
Convert your disk from MBR to GPT with Microsoft's built-in mbr2gpt tool — no reinstall, no data loss — and switch to UEFI boot.
First-use setup, material tests and ramp tests to dial in your CO2 laser for clean cutting and engraving — plus essential safety tips.
Everything you need to build and configure your RetroPie emulation setup. Also suitable for Pi 1/2/4/Zero.

Sign up and get notification about new services, promotions and sales.
