Blind Line & College Ave
Orangeville, Ontario

Convert your disk from MBR to GPT with Microsoft's built-in mbr2gpt tool — no reinstall, no data loss — and switch to UEFI boot.
In this tutorial you'll convert your disk from MBR (Master Boot Record) to GPT (GUID Partition Table) on Windows 10 — without reinstalling or losing data — using Microsoft's built-in mbr2gpt tool. GPT supports larger disks, more partitions, and is required for UEFI boot (and for upgrading to Windows 11).
Converting partition types can be risky. Back up your important data before proceeding, and make sure your motherboard actually supports UEFI boot — after conversion the PC will only boot in UEFI mode.
cmd to search for the Command Prompt.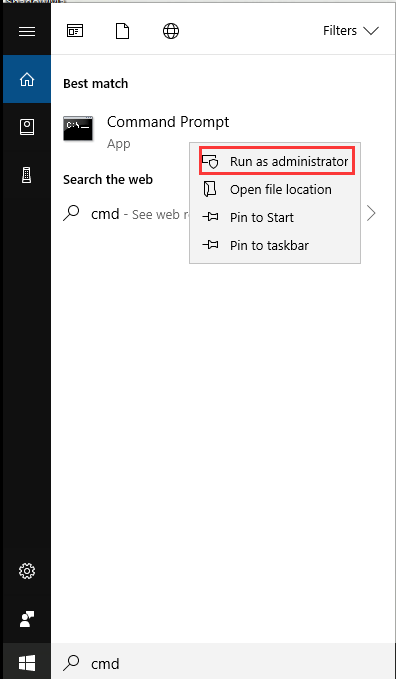
In the Command Prompt, type the following command and press Enter:
mbr2gpt /validate /allowFullOSThis performs a validation to check if your system can be converted without issues.
If validation fails, the usual causes are: more than 3 primary partitions on the disk, BitLocker enabled (suspend it first), or the disk isn't the system disk. The tool won't touch anything until validation passes.
mbr2gpt /convert /allowFullOS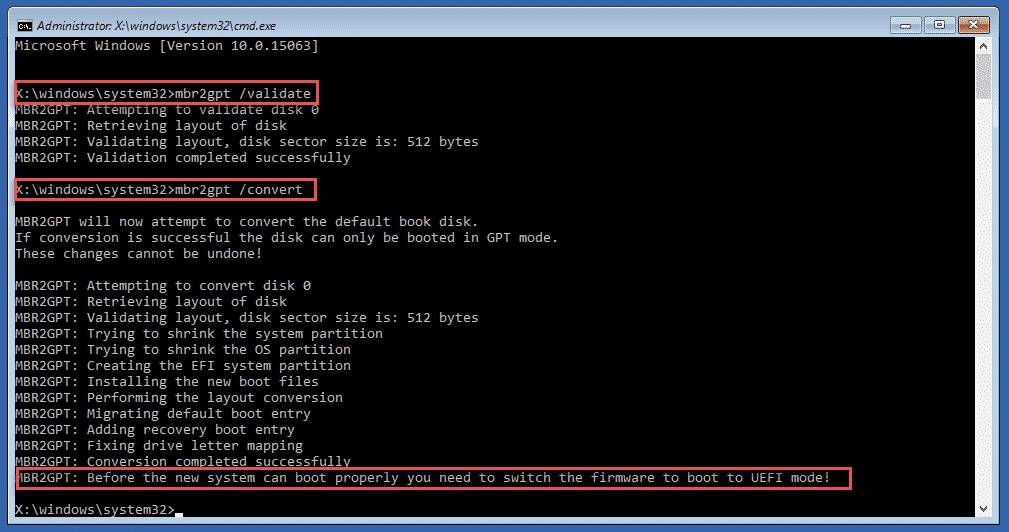
During startup, press the key for your BIOS/UEFI settings. The key varies by make and model (commonly F2, F10, or Del).
Your system now boots using GPT and UEFI. You can verify in Disk Management (right-click the disk → Properties → Volumes → Partition style shows "GUID Partition Table"). This also unlocks Secure Boot, which Windows 11 requires.
If you continue to experience slow boot times after converting, the disk probably isn't the bottleneck — check out our guide: A Guide to Diagnosing a Slow Windows PC.
Track down what's slowing your PC — Task Manager, startup programs, disk health, malware checks and more, step by step.
First-use setup, material tests and ramp tests to dial in your CO2 laser for clean cutting and engraving — plus essential safety tips.
Everything you need to build and configure your RetroPie emulation setup. Also suitable for Pi 1/2/4/Zero.
The full Wii softmod, start to finish: Wilbrand exploit → Homebrew Channel → BootMii NAND backup → Priiloader → cIOS → USB game loading.

Sign up and get notification about new services, promotions and sales.
